ⓘ Important
This content applies to the Windows Virtual Desktop Fall 2019 release without Azure Resource Manager objects.
Click here for guides using Windows Virtual Desktop Spring 2020 update public preview with Azure Resource Manager objects.
In Part 2 of this series, you created a WVD tenant. in Part 3, you created a service principal and a role assignment for the service principal. Now you will use the Azure Marketplace to create a Windows Virtual Desktop host pool. Host pools contain the virtual machines that users connect to in your WVD tenant.
Provision a new host pool
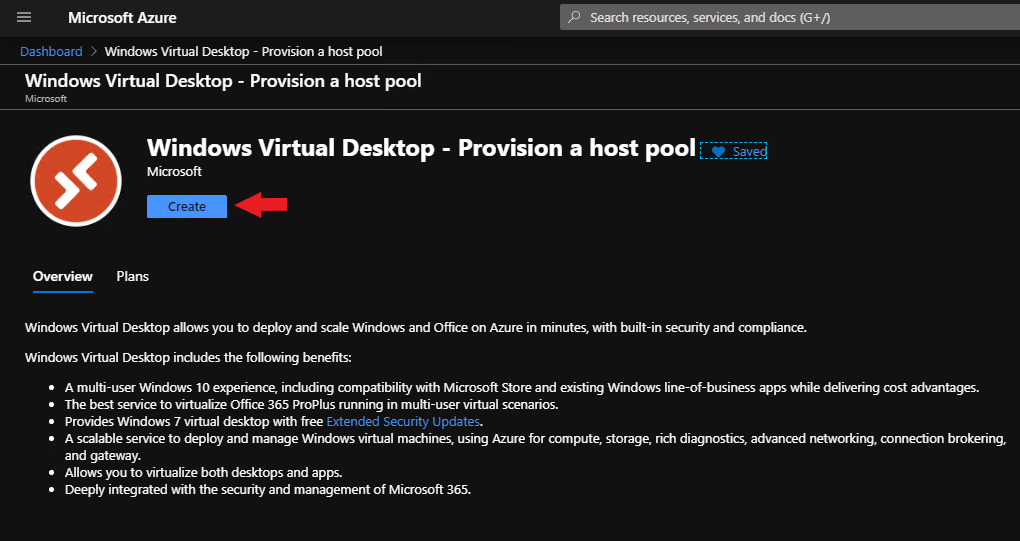
To create a Windows Virtual Desktop host pool, start by signing in to your Azure Portal. Then, in the search bar at the top, type Windows Virtual Desktop. Be sure to select Windows Virtual Desktop – Provision a host pool from Marketplace. Windows Virtual Desktop under Services is used with the Windows Virtual Desktop Spring 2020 update, which I will cover in future posts.

This will take you to an overview of Windows Virtual Desktop. Select Create to begin provisioning your host pool.
The host pool provisioning wizard is organized into pages, or tabs. There are four tabs: Basics, Configure virtual machines, Virtual machine settings, and Windows Virtual Desktop information.
Basics
On the Basics tab:
- Subscription
Select your subscription from the list. - Resource group
Select an existing resource group, or select Create new and provide a unique name.
If you are trying to select an existing resource group an it is not in the list, you might need to change the region first in the next field, and then try to select the resource group again. - Region
Select a region from the dropdown list. - Host pool name
Enter a name for your host pool. This name must be unique. - Desktop type
If you select Personal, each user will be permanently assigned to a virtual machine.
If you select Pooled, you will be able to take advantage of Windows 10 multi-session, and have multiple users per VM. - Default desktop users
Enter a comma-separated list of UPNs of the users you want to grant access to Windows Virtual Desktop.
The users you list here will be added to the Desktop Application Group, and have access to the full Windows 10 desktop.
You can add users later as well, using PowerShell. I like to add a single user here, for testing, and add additional users later.
If you want to test your deployment at the end of this post, add at least one licensed user. Remember the license requirements from Part 1? - Service metadata location
Choose the same location as the virtual network that has connectivity to your Active Directory domain controller.

- Select Next: Configure virtual machines
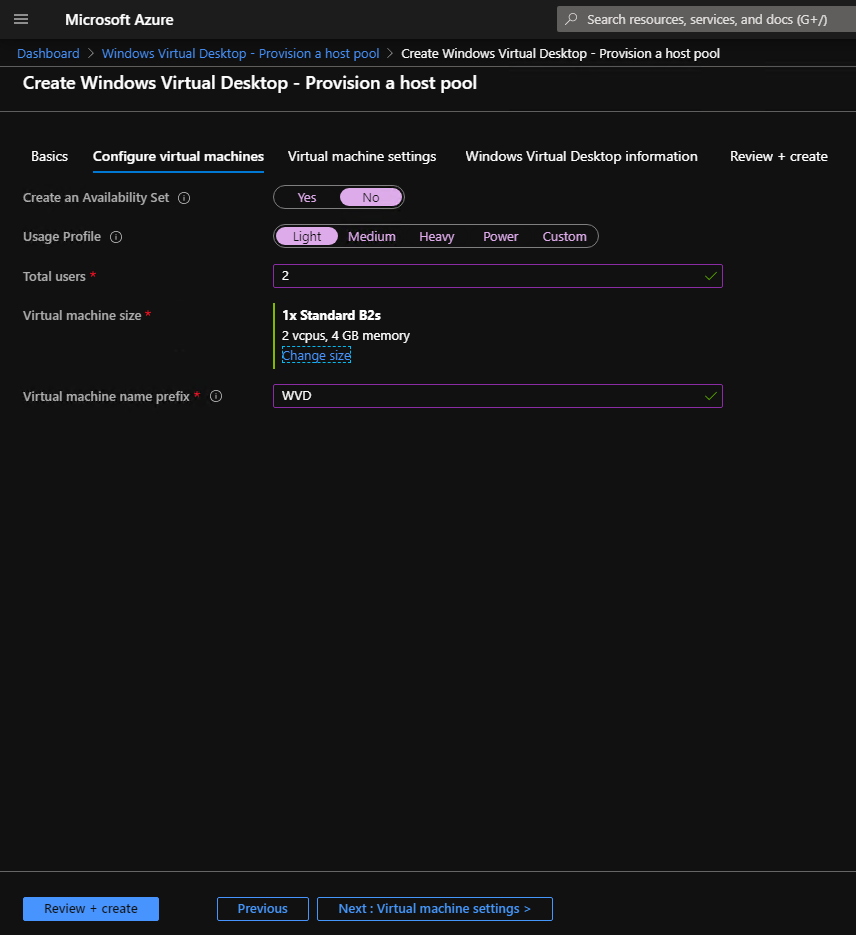
Configure virtual machines
On the Configure virtual machines tab:
- Create an Availability Set
Availability Sets ensure that the VMs are distributed across multiple, isolated hardware nodes in a cluster, providing high availability. - Usage profile
The usage profile determines the number of users per vCPU. The choices are Light (6), Medium (4), Heavy (2), and Custom. Choose custom to create a specific number of VMS. - Total users
The total number of users, combined with the usage profile and the VM size will determine how many VMs are created in your host pool.
Number of VMs = TotalUsers / (UsageProfile * vCPUs)
If you choose Light (6), and enter a total number of users of 50, and pick a VM size that has 4 vCPUs, you will create 3 VMs in your host pool. Each VM has 4 vCPUs and each vCPU can support 6 users. That’s 24 users per VM. Two VMs would cover 48 users, you’ll need 3 VMs to support 50 users. - Virtual machine size
Here you can see the number of VMs that will be created, based on your selections above, and the default VM size.
You can accept the default size, or select Change size to select a different size VM. - Virtual machine name prefix
VMs will be named by adding a dash and an incrementing number to the prefix you specify. (Prefix-1, Prefix-2, …)

- Select Next: Virtual machine settings
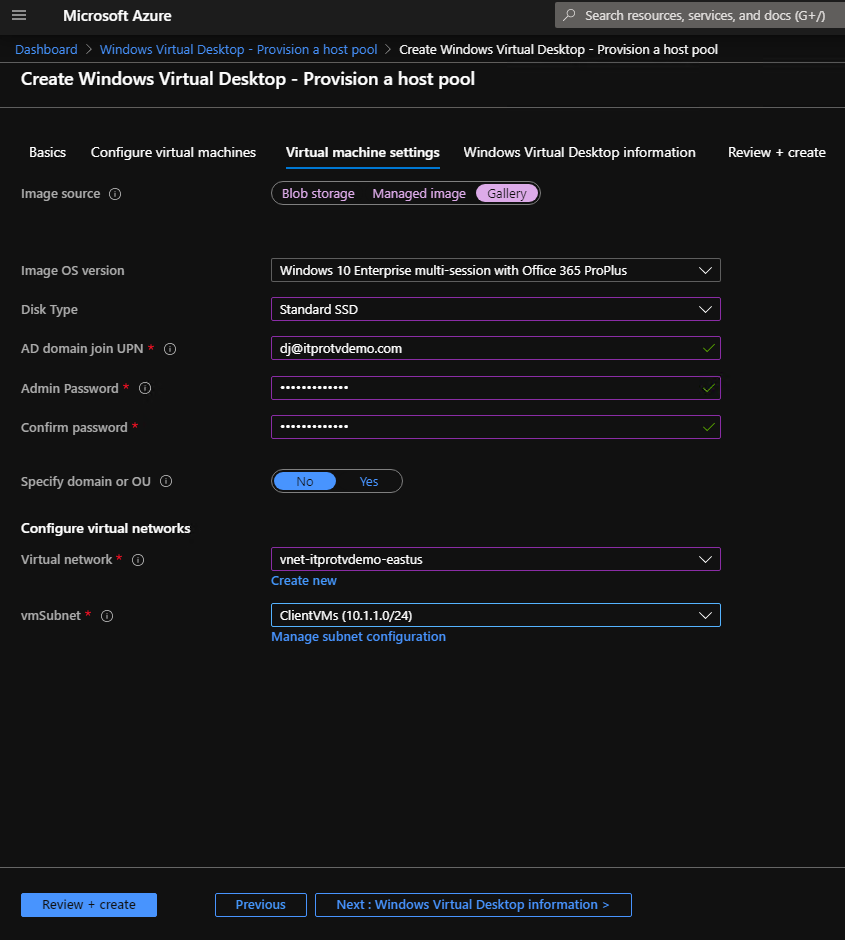
Virtual machine settings
On the Virtual machine settings tab:
- Image source
You can choose Blob storage, Managed image, or Gallery as your image source. The information required will be different, depending on what you choose.
Choosing Blob storage will require an image URL that points to a generalized .vhd file in your storage account.
If you choose Managed image, it will require the name of the Azure managed image to be used as the source OS for the VMs and the name of the existing resource group that contains the Azure managed image.
Choosing Gallery will present a list of available OS images to choose from. - Disk type
Choose between Premium SSD, Standard SSD, and Standard HDD. - AD domain join UPN
Enter the UPN and password of an account that has permissions to join the VMs to your domain.
A local user account with the same user name and password will be created on the VMs in your host pool.
Ideally, you would use a standard AD user account that has been delegated the ability to join machines to the domain.
Do not use an account that has MFA enabled. - Specify domain or OU
If you select No, the suffix of the AD domain join UPN from the previous step will be used as the domain name to join, and the computer accounts for the VMs will be created in your default location in Active Directory (Flashback: remember the command redircmp?). You can move them later if you need to.
If you want to specify a different domain, and/or a specific OU for the VM computer accounts, select Yes and provide the domain name and/or the distinguished name of the OU. - Virtual network
Select the virtual network that is connected to your Active Directory domain controller. - vmSubnet
Select the subnet that the virtual machines will be connected to.

- Select Next: Windows Virtual Desktop information
Windows Virtual Desktop information
On the Windows Virtual Desktop information tab:
- Windows Virtual Desktop tenant group name
In most cases, you should leave the default value. This is used to simplify the management of multiple tenants. - Windows Virtual Desktop tenant name
Enter the name of your Windows Virtual Desktop tenant you created in Part 2. - Windows Virtual Desktop tenant RDS Owner
Select the type of account to use when creating your host pool. This account must have RDS Owner or RDS Contributor permissions in your Windows Virtual Desktop tenant.
If you select User account, enter the UPN and password.
If you created a service principal in Part 3, select Service Principal. Enter the application ID and password for the service principal, and the Azure AD tenant ID.
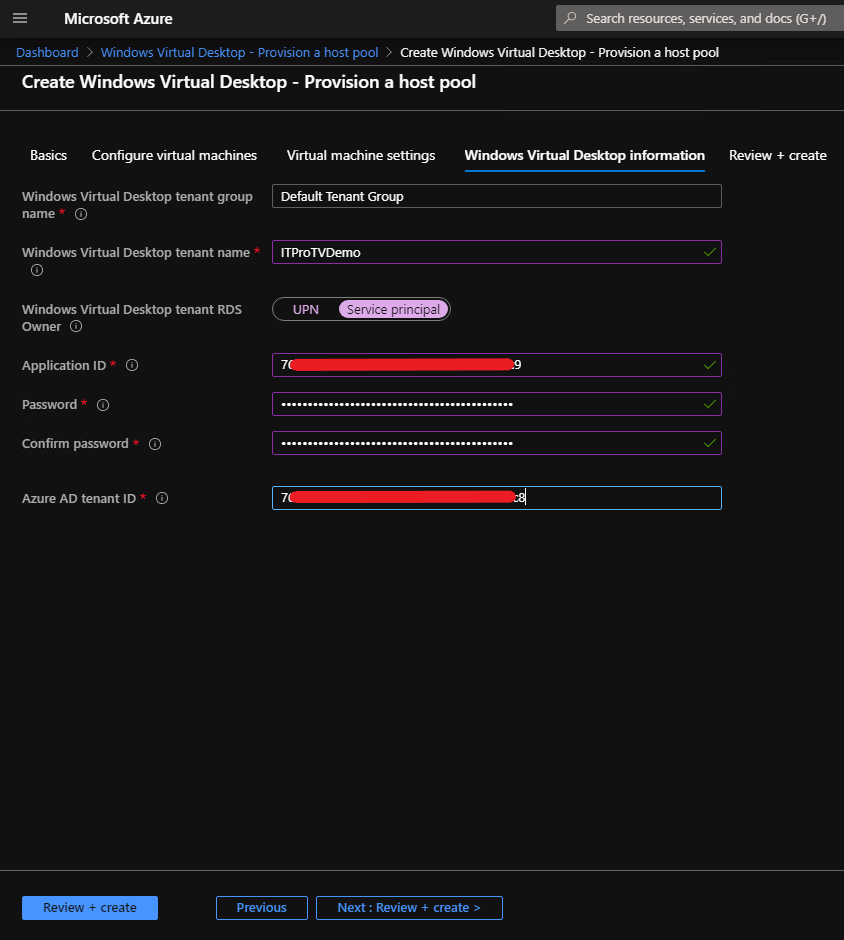
- Select Next: Review and create
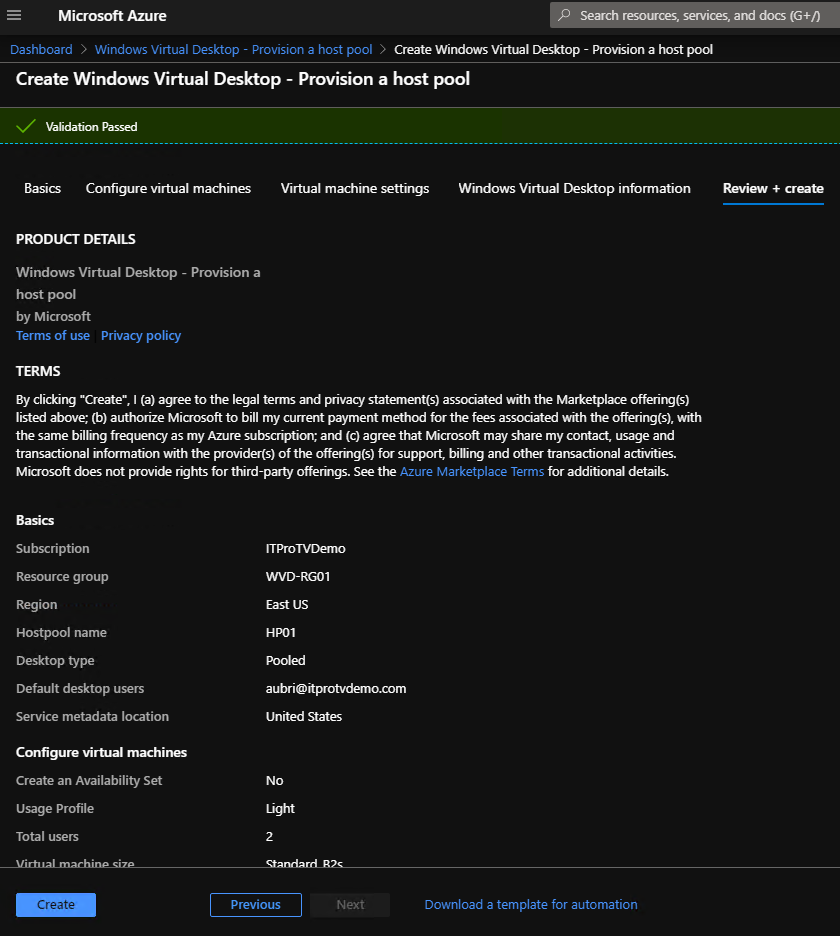
Review and create
When you select Review and create, Azure will run your configuration through a validation check. You should see a green bar across the top, stating that the validation passed. If validation fails, most likely some required information is missing or not valid. Use the Previous button, or select the tab names across the top, and make the appropriate changes.
Once everything looks correct, and validation passes, select Create to start the deployment of your host pool. This will take 20 minutes or longer, depending on how many VMs you are creating.
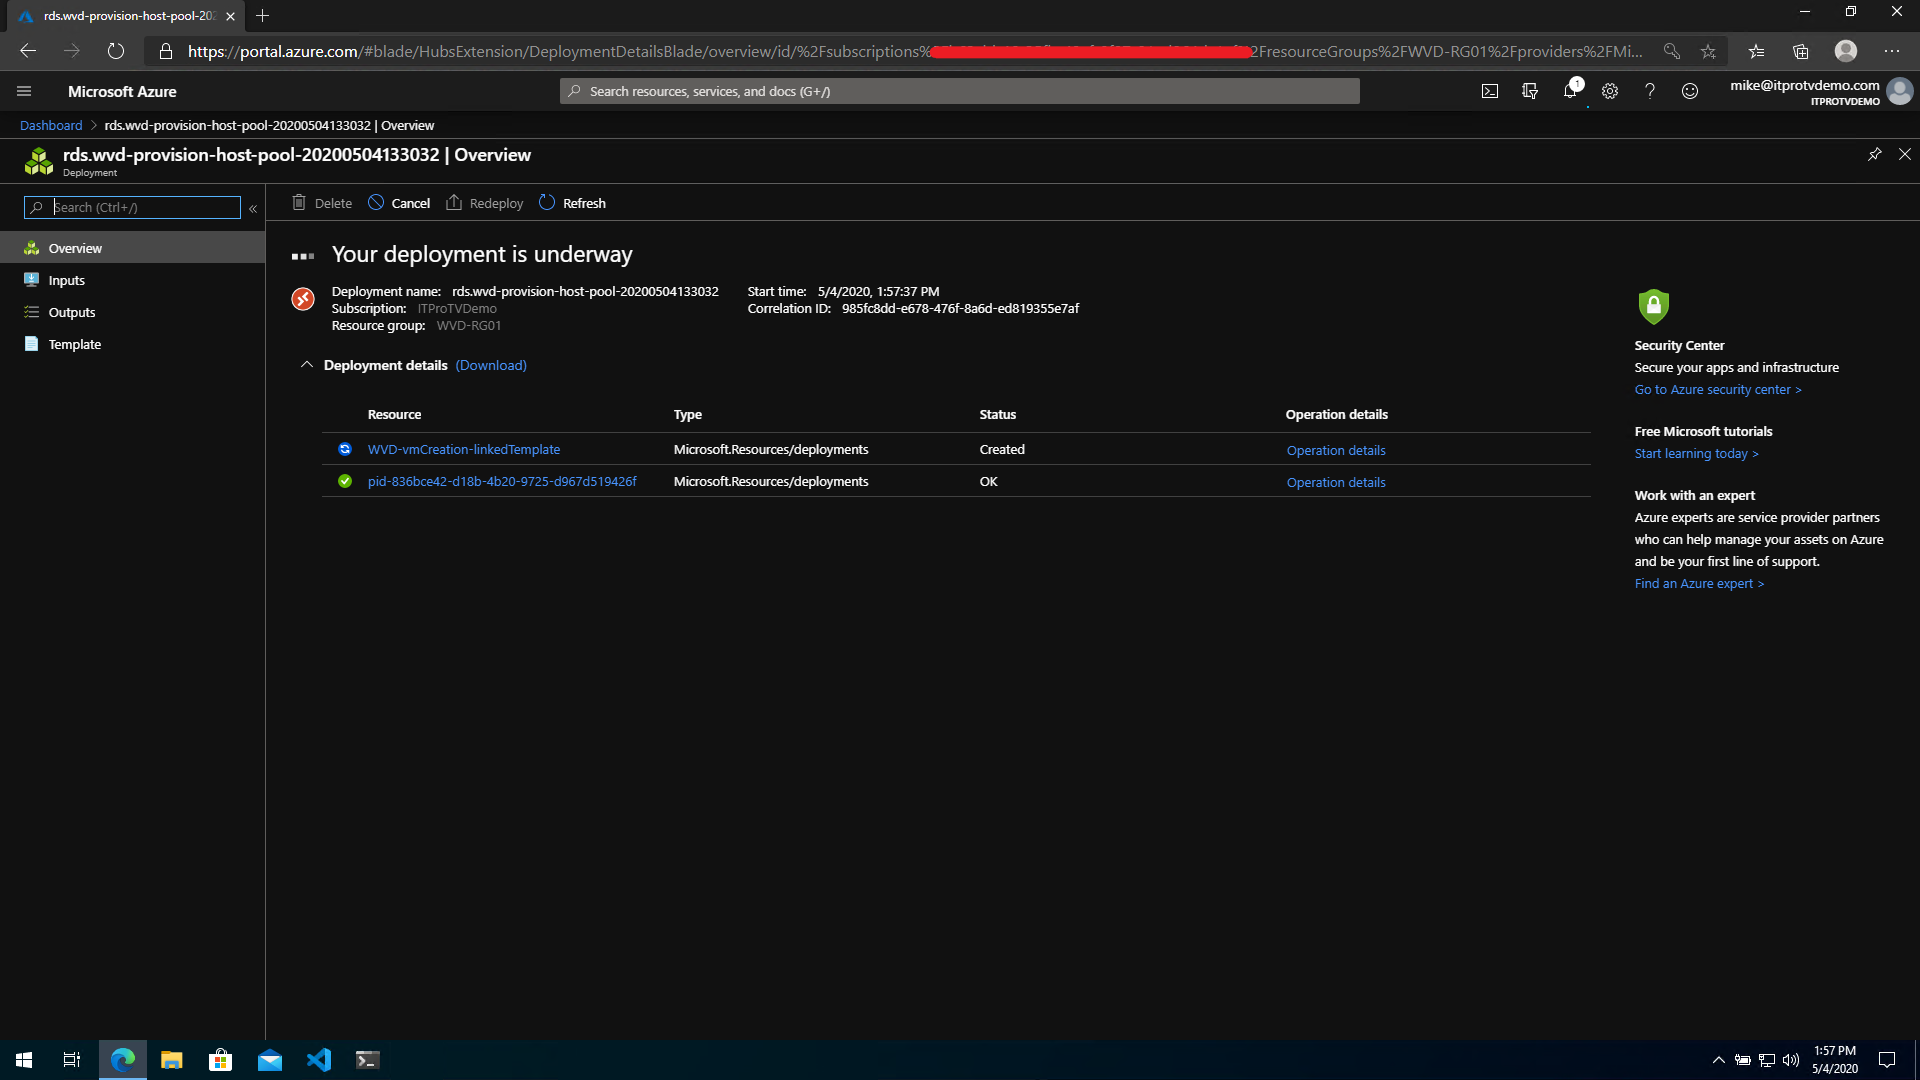
Deployment progress is displayed on the next screen, but you can safely navigate away from this screen without interrupting the deployment.
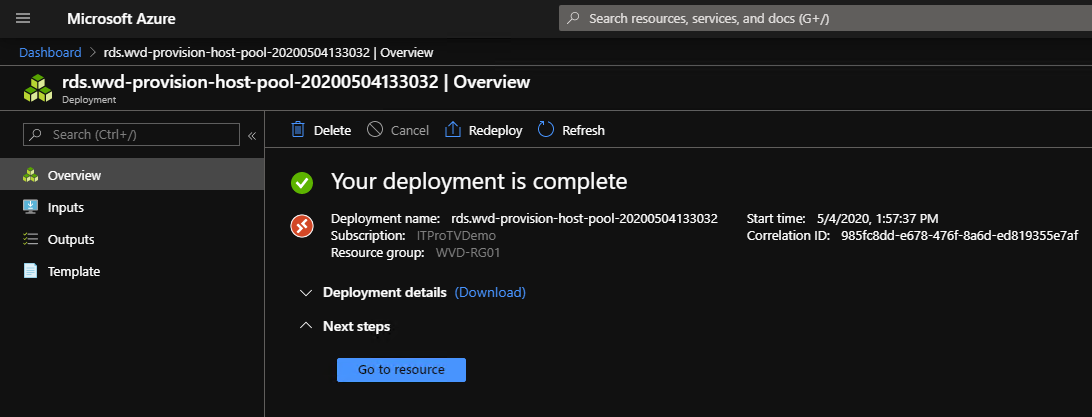
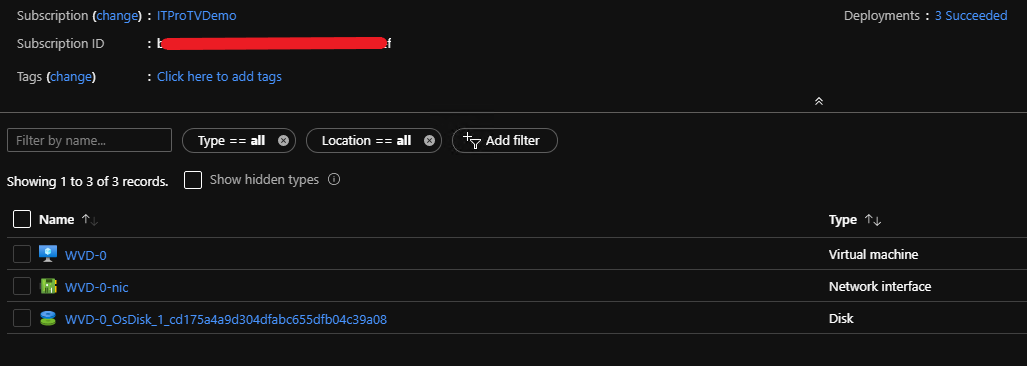
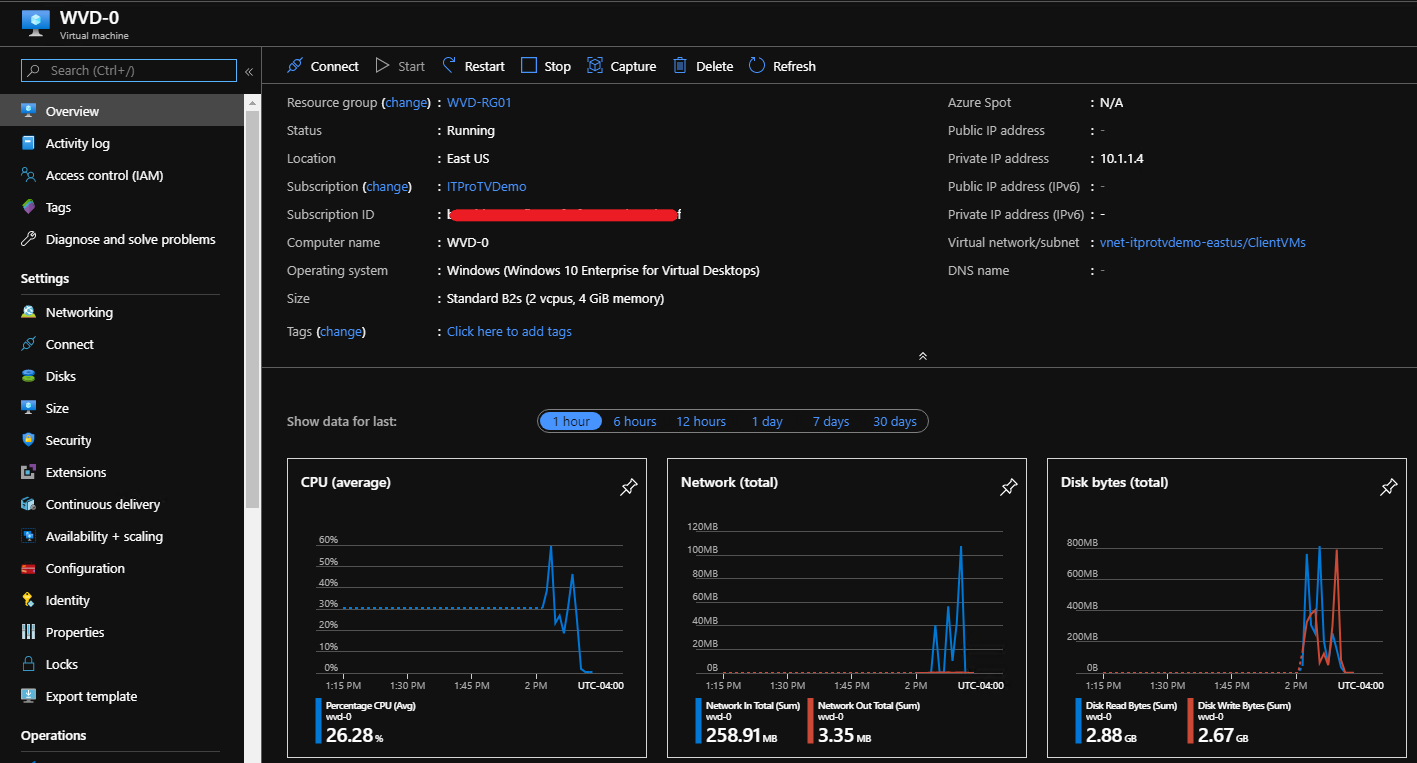
Once the deployment has completed, you can select Go to resource, and you can see the resources that were created as part of your deployment. You can select a resource to see details about the resource.
Connect to Windows Virtual Desktop
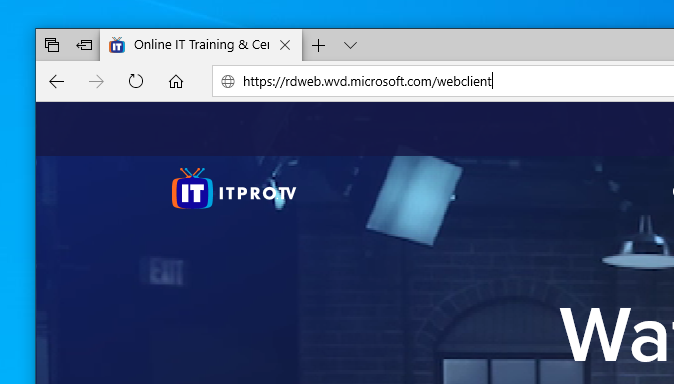
Time to test it out! There are a couple of ways to connect to Windows Virtual Desktop, depending on the OS you are using. For this test, you will use the web client, which will allow you to connect from any OS, all you need is an HTML5-capable browser.
Open your browser and navigate to https://rdweb.wvd.microsoft.com/webclient, and authenticate using the account you added to the Default desktop users when deploying the host pool.

Once authenticated, on the All Resources tab, you should see your tenant listed, with an icon representing the host pool.
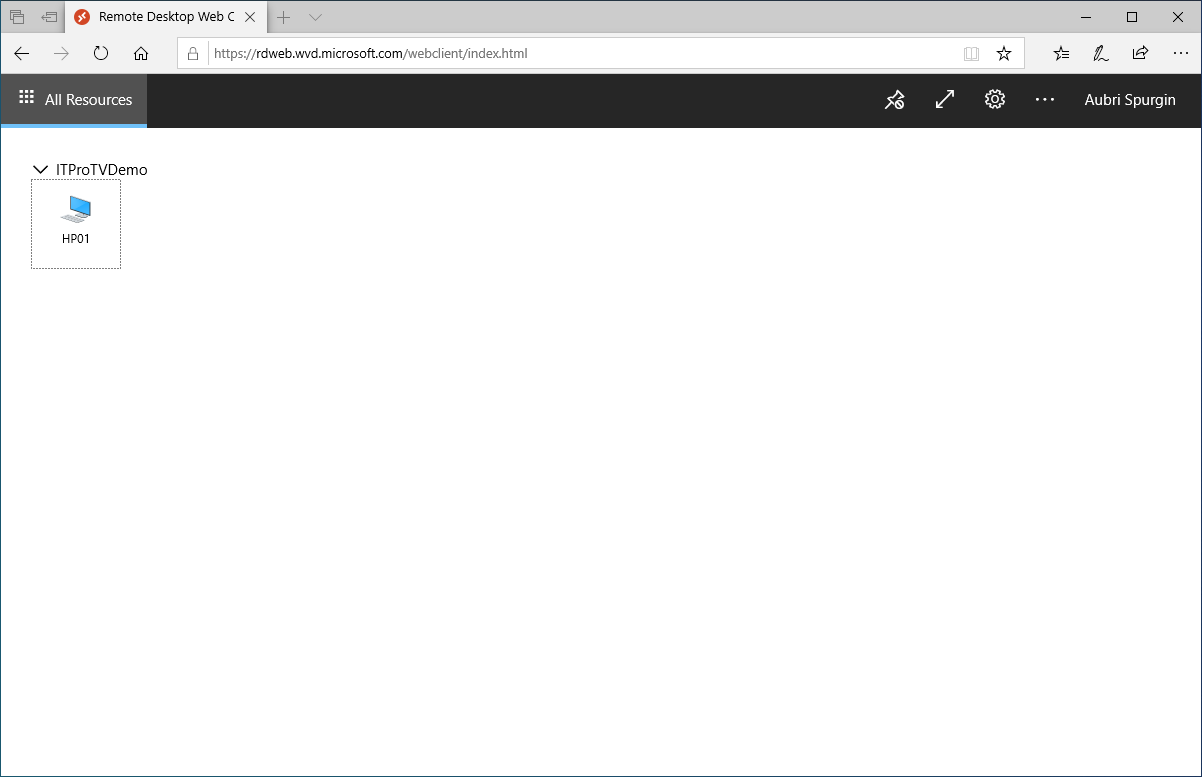
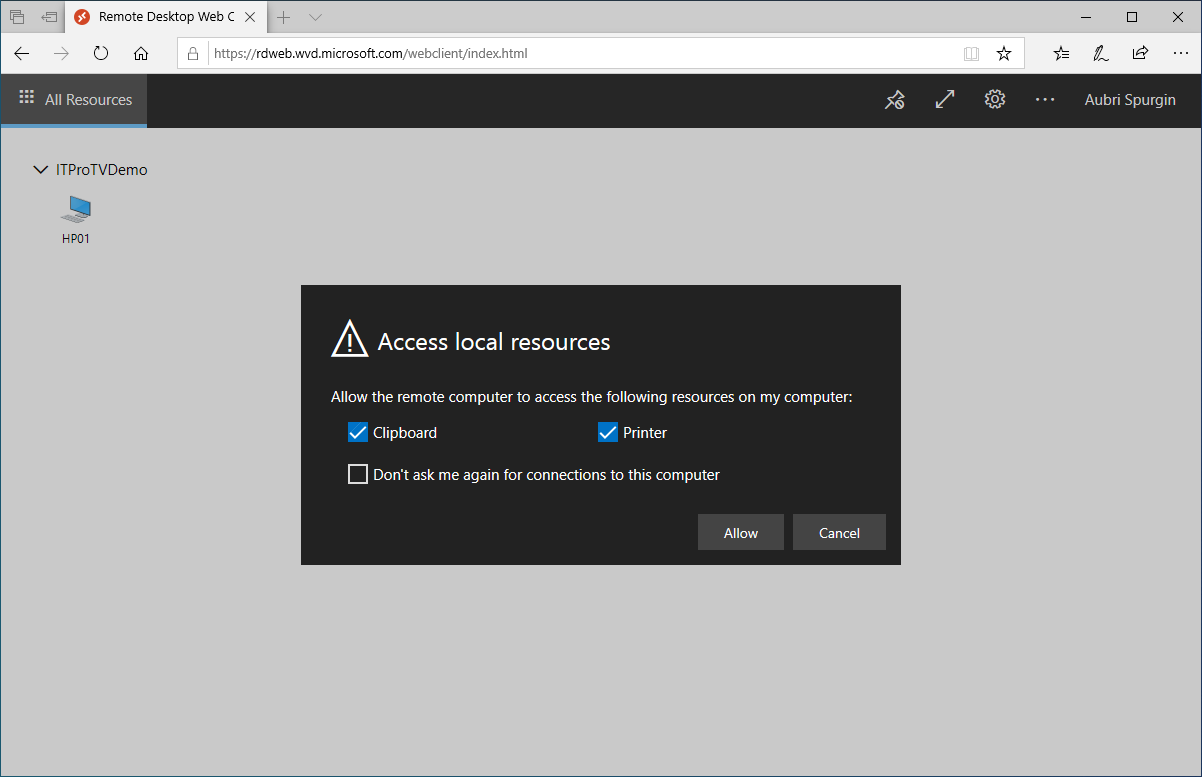
Click the icon to connect. In the RDP prompt for access to local resources, make any changes necessary, and select Allow.
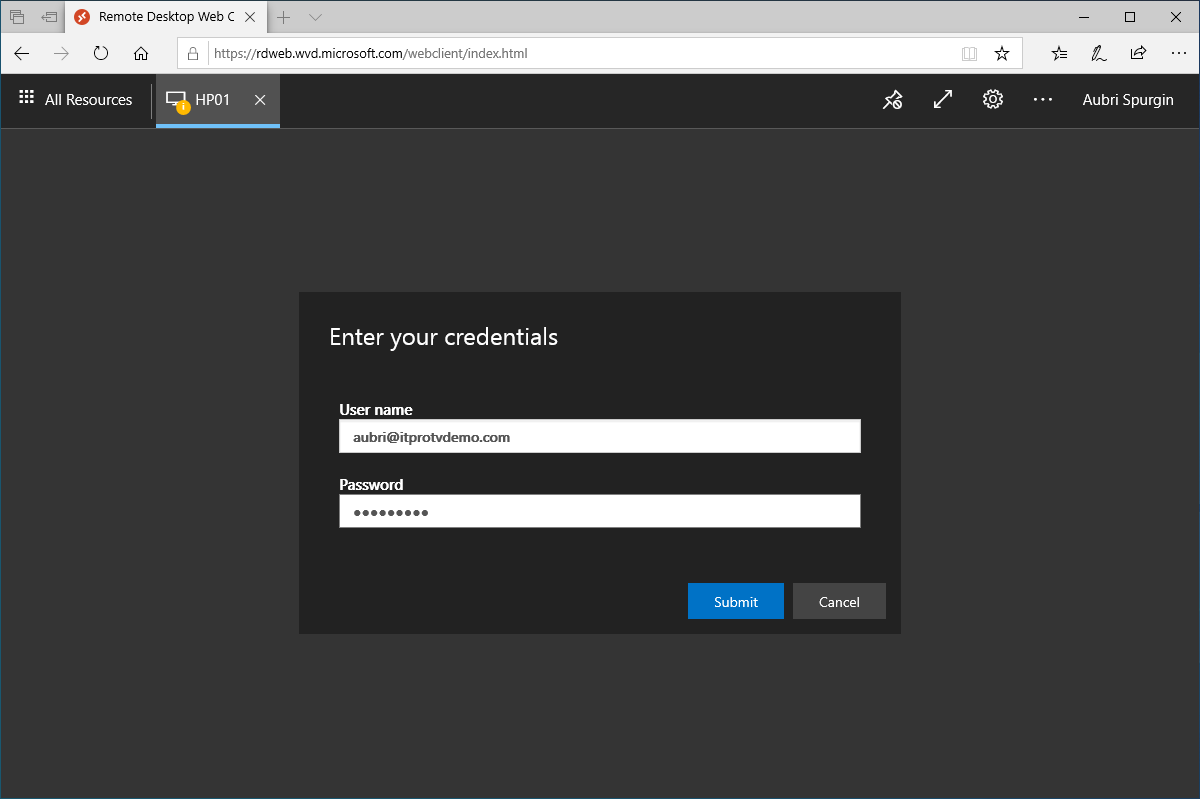
You will then be prompted to Enter your credentials. Enter the users credentials again. This is to authenticate to the VM, where the prior authentication was to the WVD tenant. SSO functionality is in the works.
Congratulations, you are now connected to a Windows Virtual Desktop!
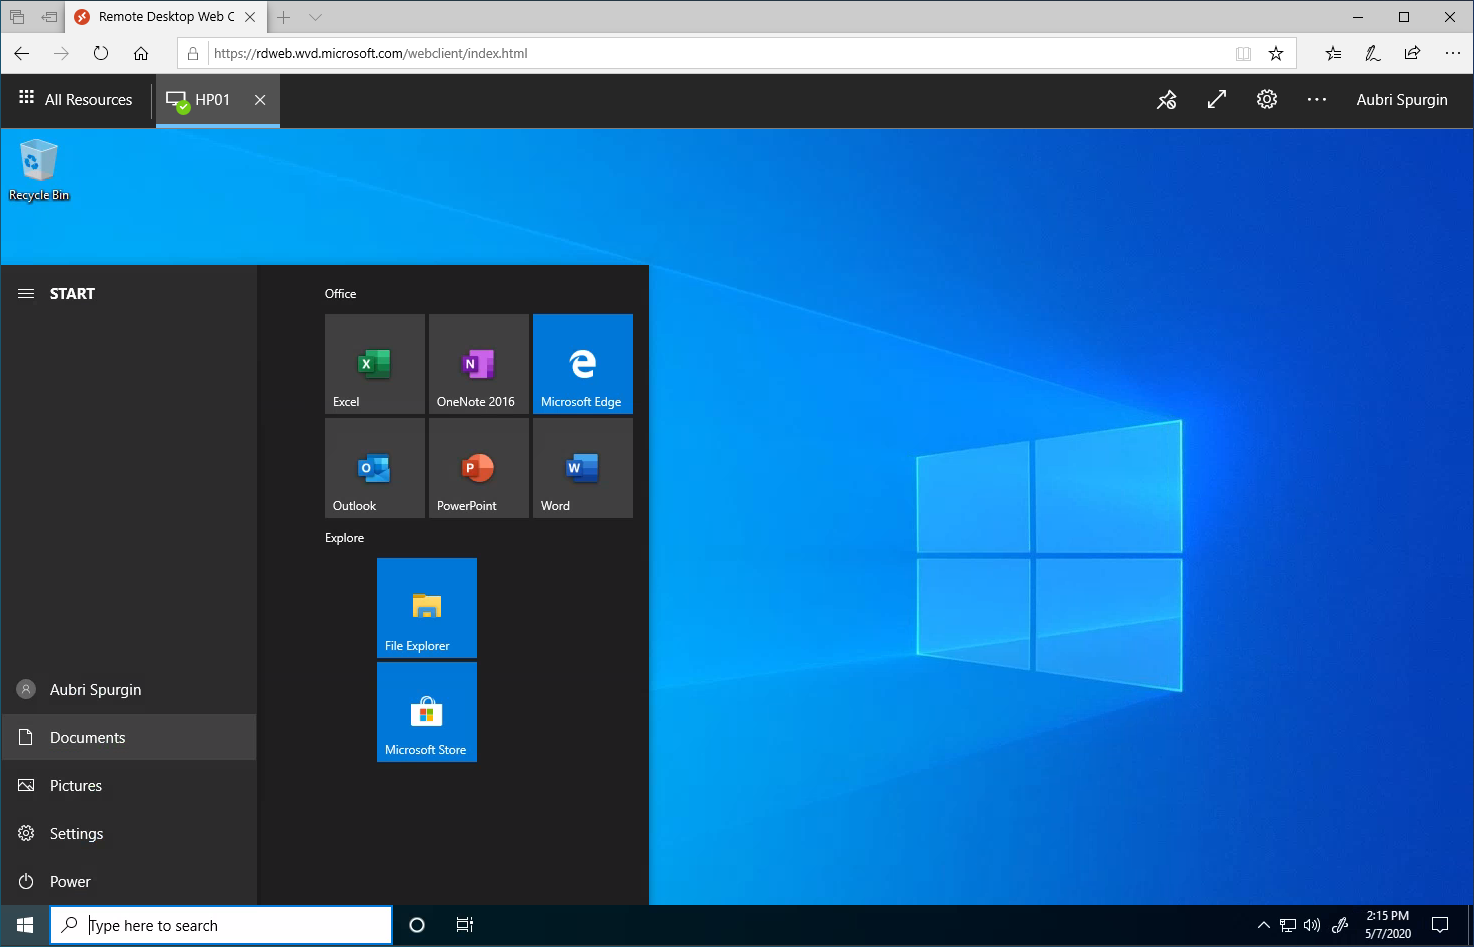
If you chose the Windows 10 Enterprise multi-session with Office 365 ProPlus, you will notice that Office is already installed. How convenient is that?
What’s Next?
Now that you have a Windows Virtual Desktop host pool up and running, your next task is to determine what users need access, and what they need access to. For full desktop access, you can add additional users to the Desktop Application Group. If you want to limit access to specific applications, you will need to create RemoteApp group(s) and grant access to them. I will show you how to do both in Part 5, Manage App Groups.
Make sure to check out more great articles at ITProTV
I’ve also done two webinars on Windows Virtual Desktop. You can watch them on demand for free:
Comments are closed