ⓘ Important
This content applies to the Windows Virtual Desktop Fall 2019 release without Azure Resource Manager objects.
Click here for guides using Windows Virtual Desktop Spring 2020 update public preview with Azure Resource Manager objects.
In Part 4, you created a host pool and session host VMs. You also added a user to the Desktop Application Group, which gave the user access to a full Windows 10 desktop experience. In this tutorial, you will learn how to manage WVD app groups. You will add additional users to the Desktop Application Group, and create RemoteApp groups, where you can publish individual Start menu apps.
To create and manage WVD app groups, you will be using the Windows Virtual Desktop PowerShell module. Go back to Part 2 if you need help installing and importing the module. Then, sign into your account with the following cmdlet:
Add-RdsAccount -DeploymentUrl https://rdbroker.wvd.microsoft.comManage the Desktop Application Group
In the cmdlets used to create and manage the Desktop Application Group and RemoteApp groups, you will find yourself typing your tenant name, host pool name, and app group names repeatedly. To make life a little easier, you can store this information in variables. If you choose not to use variables to store the names, skip to step 4, and type the full names in place of the variables.
- Get the name of your tenant you created in Part 2, and store the name in a variable:
Get-RdsTenant
$t = “TenantName”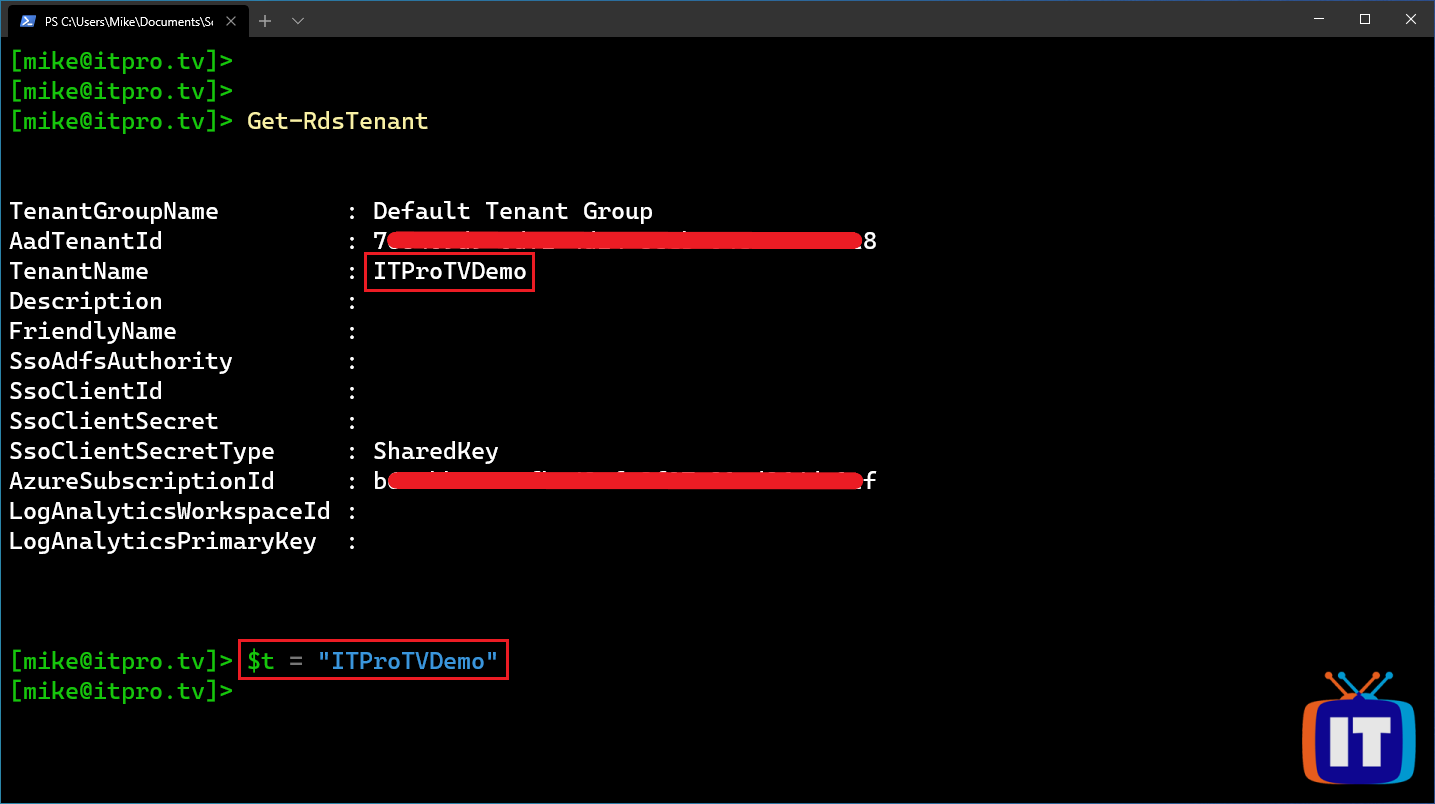
- Get the name of your host pool you created in Part 4, and store the name in a variable:
Get-RdsHostPool $t
$h = “HostPoolName”
- Get the name of your app group and store the name in a variable. At this point, you should just have the default app group created when you created your host pool, called “Desktop Application Group”:
Get-RdsAppGroup $t $h
$dag = “Desktop Application Group”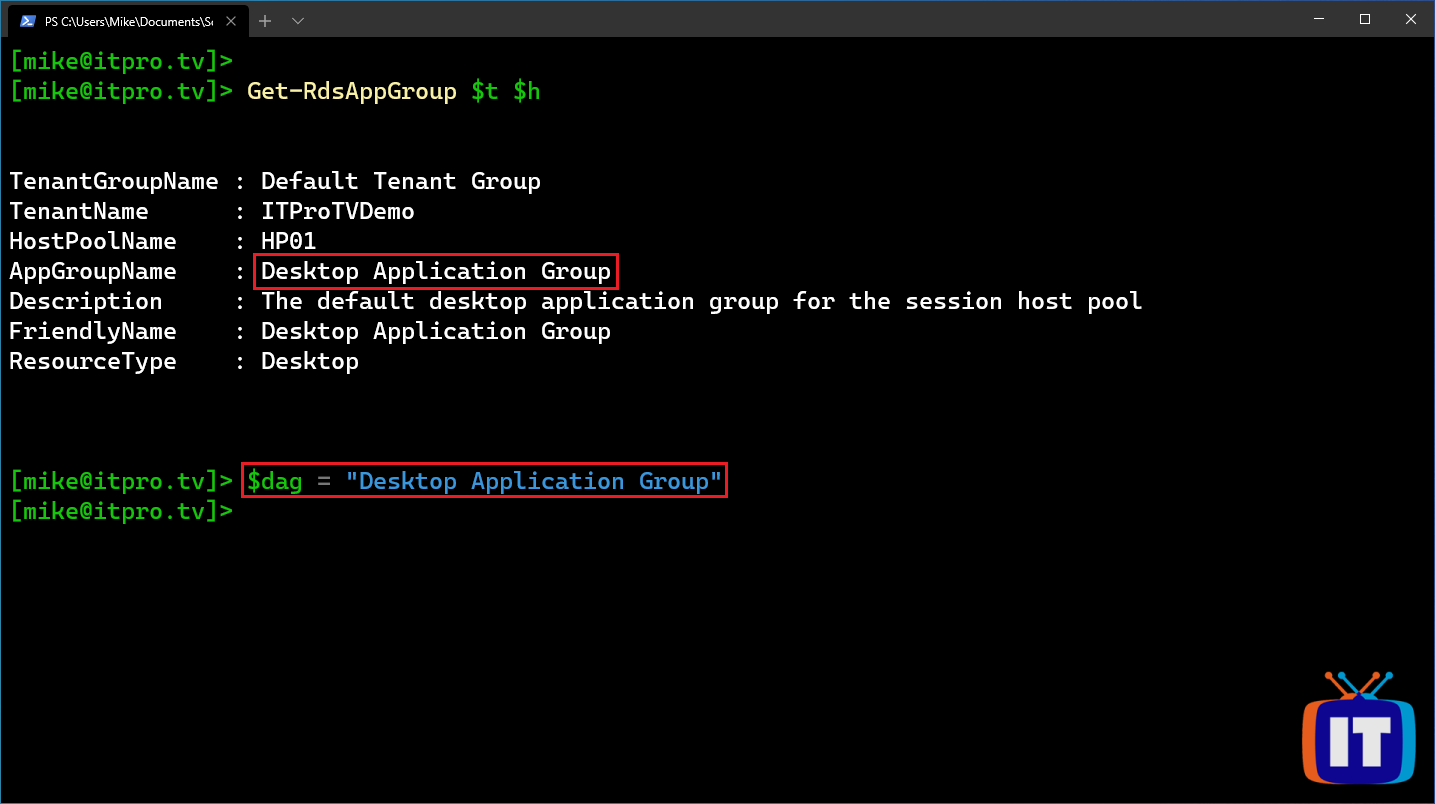
Aren’t these commands easier using variables?
You added a single user to the Desktop Application Group when you created the host pool, and verified the user had access. Next you will learn how to add additional users to the Desktop Application Group.
- The following cmdlet is used to retrieve the members of an app group:
Get-RdsAppGroupUser $t $h $dag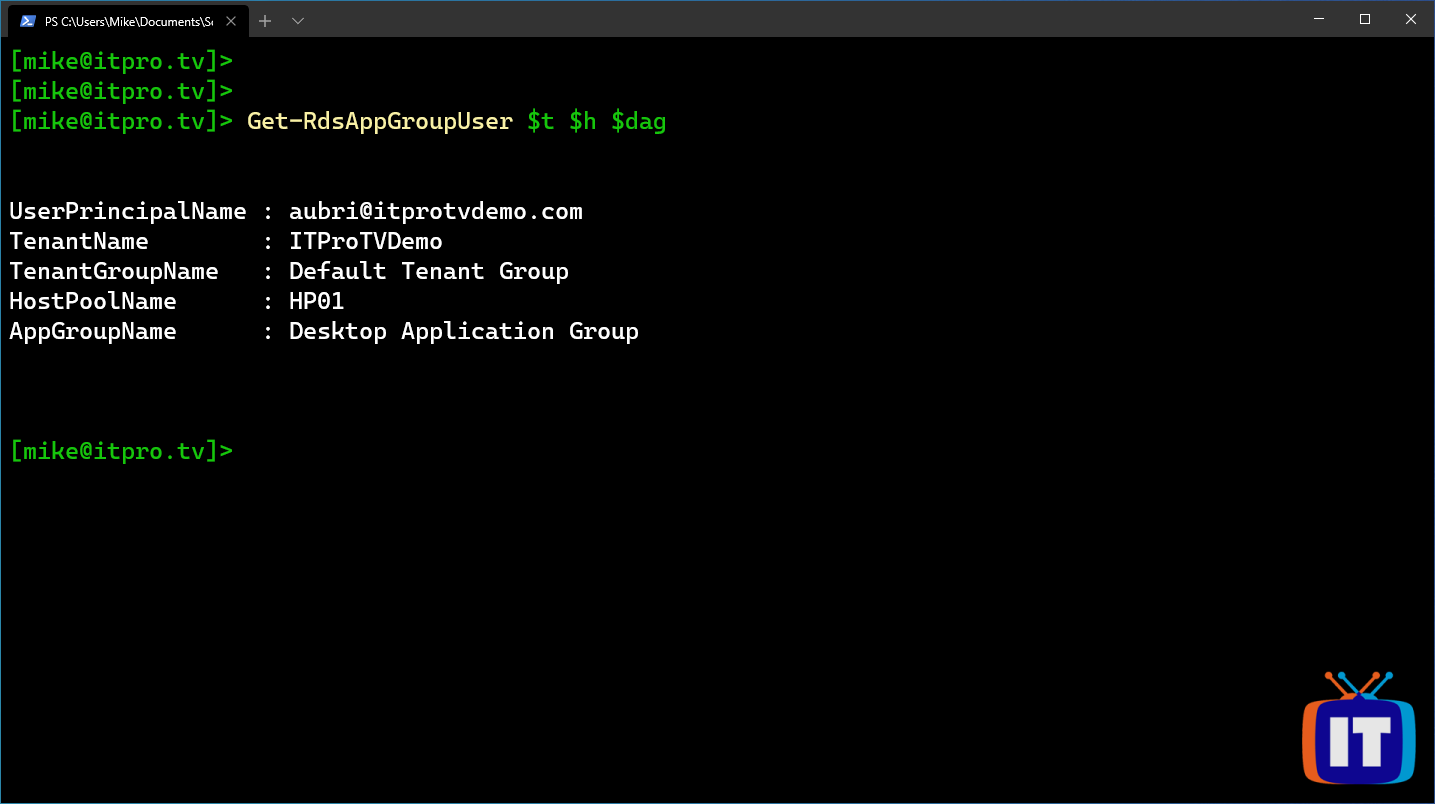
- To add additional users to an app group and verify membership:
Add-RdsAppGroupUser $t $h $dag -UserPrincipalName “userUPN”
Get-RdsAppGroupUser $t $h $dag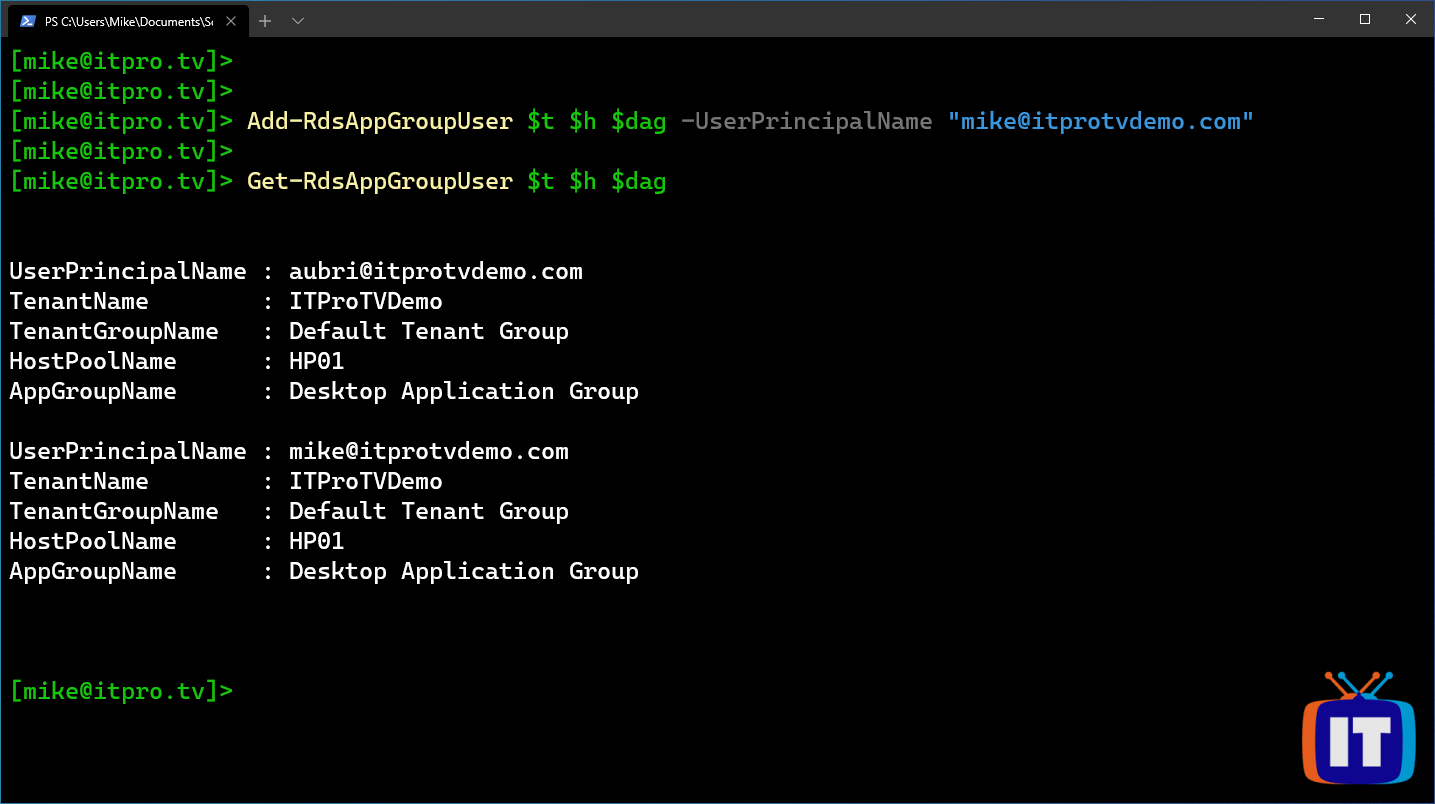
Unfortunately, you can only add users one at a time, and not groups. If you are feeling creative, you can use a script to automate adding multiple users.
Create a RemoteApp group
So now you know how to give users access to the full desktop experience, but what if they do not need the full desktop? You can create one or more additional app groups to publish individual or groups of applications as well.
The first RemoteApp group you create will be used to publish Microsoft Excel, Microsoft Word, and Microsoft PowerPoint. These are available if you used the Windows 10 multi-user with Office 365 image from the gallery when you created your host pool. If you chose a different image, simply choose different applications to publish. You will see how to list the available applications to publish coming up.
- To create a new RemoteApp group, use the following cmdlet:
New-RdsAppGroup $t $h -AppGroupName “newName” -ResourceType “RemoteApp”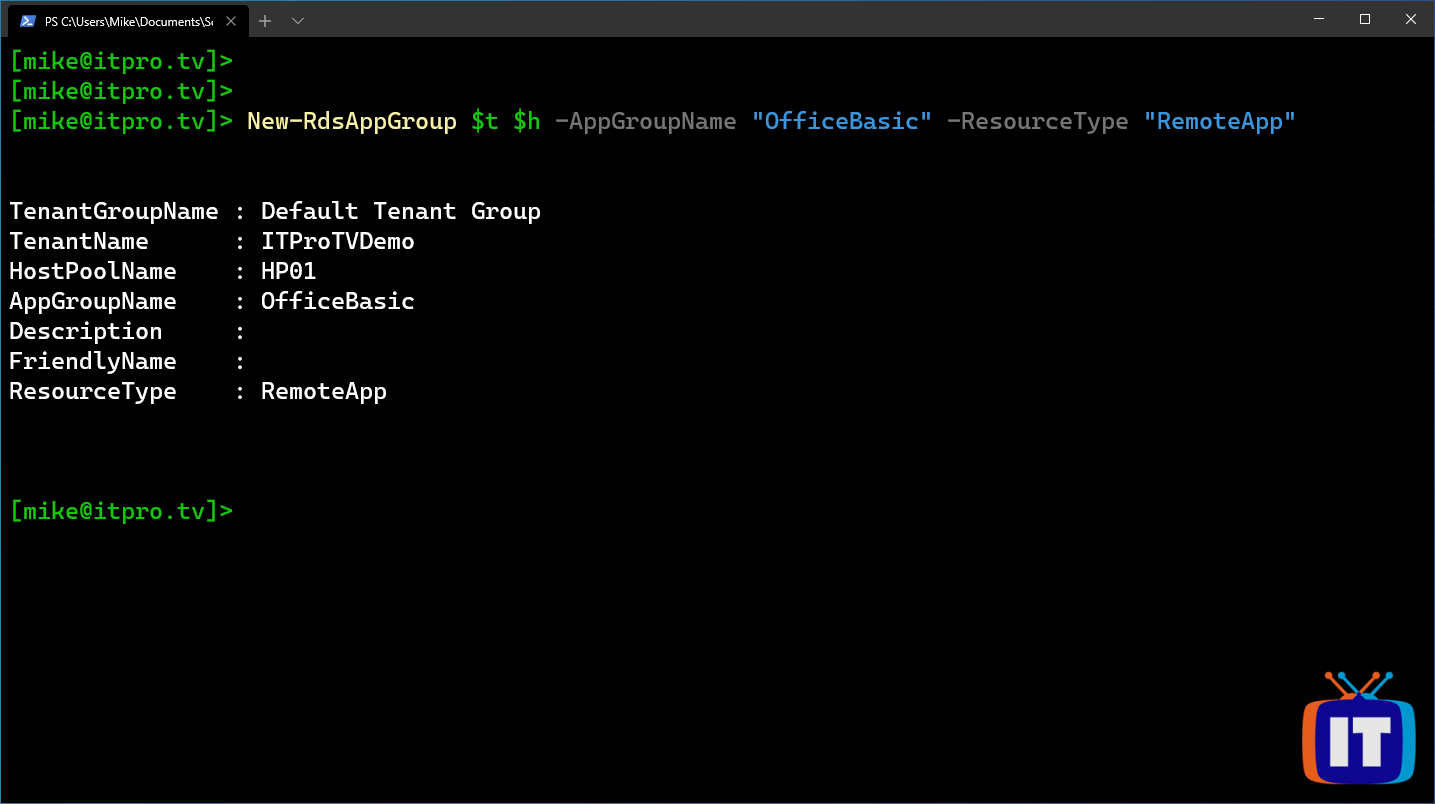
- To verify you created the RemoteApp group:
Get-RdsAppGroup $t $h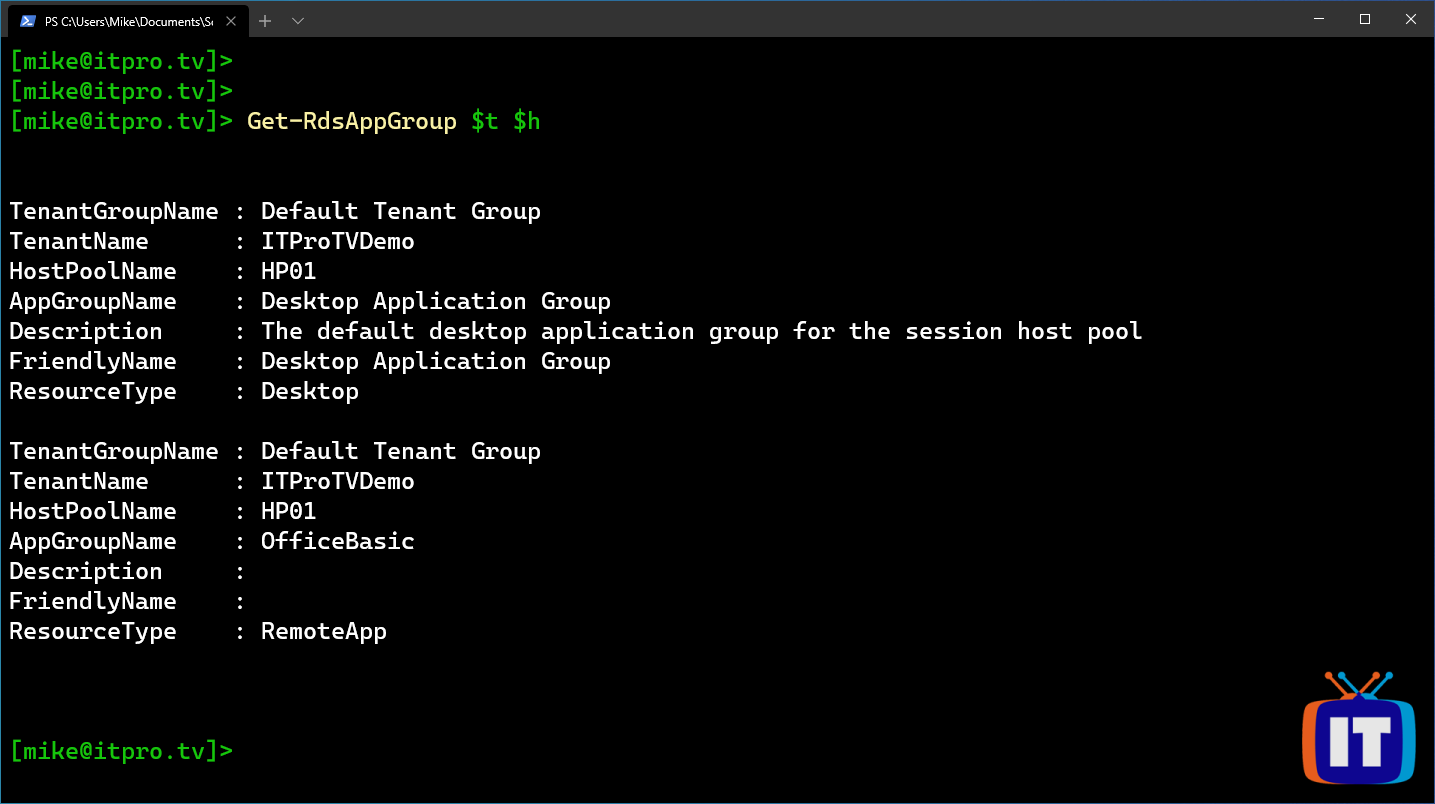
You should see the new RemoteApp group listed, along with the default Desktop Application Group.
Publish applications to a RemoteApp group
The new RemoteApp group is empty. You now need to publish applications to the RemoteApp group. To publish applications, you will need to list what applications are available, and add them to the RemoteApp group.
- To list the available applications:
Get-RdsStartMenuApp $t $h -AppGroupName “OfficeBasic”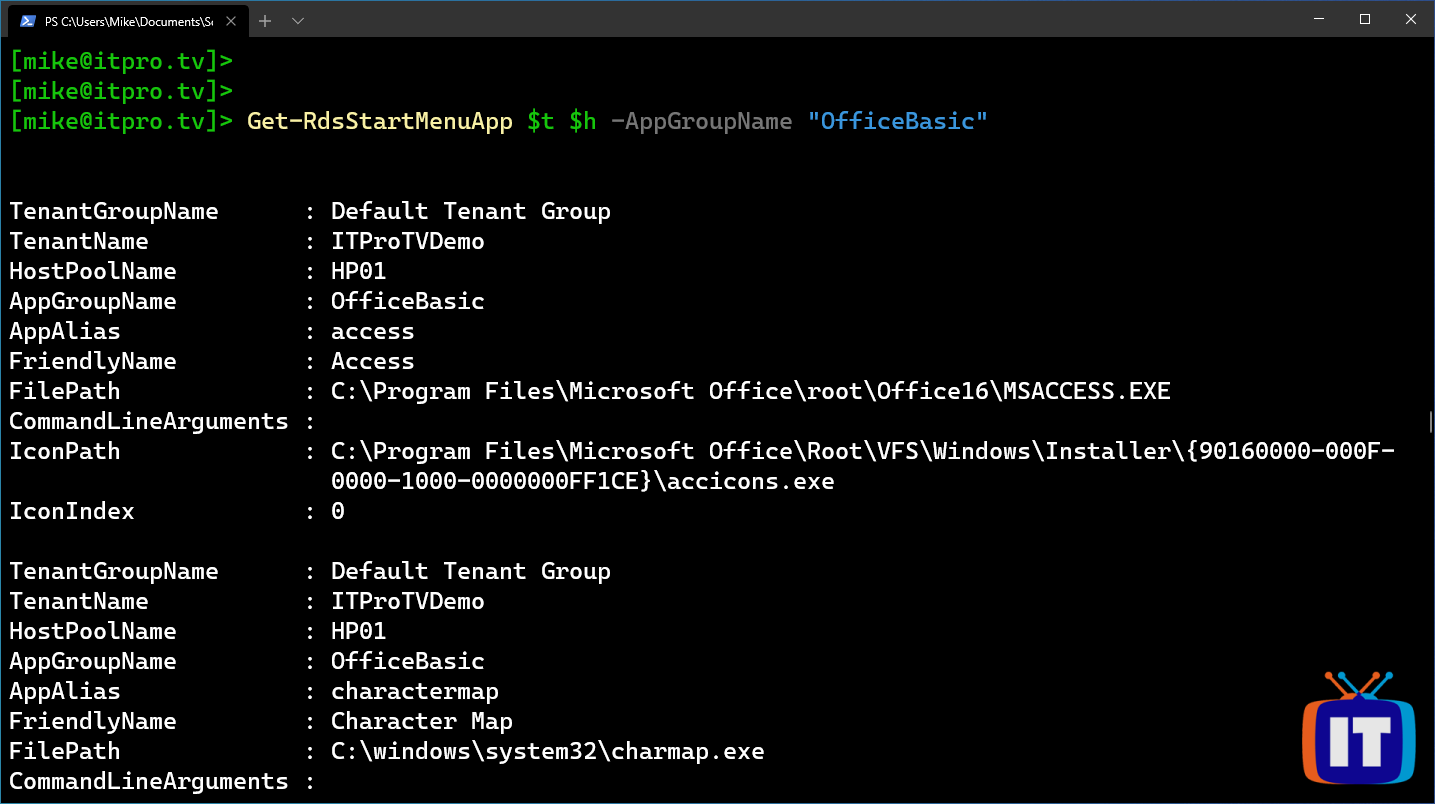
Depending on your image, this list can be long. You only need the FriendlyName and AppAlias to publish an application. You can also store the new RemoteApp group name in a variable to make future cmdlets easier, otherwise use the full RemoteApp group name.
$ob = “OfficeBasic”
Get-RdsStartMenuApp $t $h $ob | ft FriendlyName, AppAlias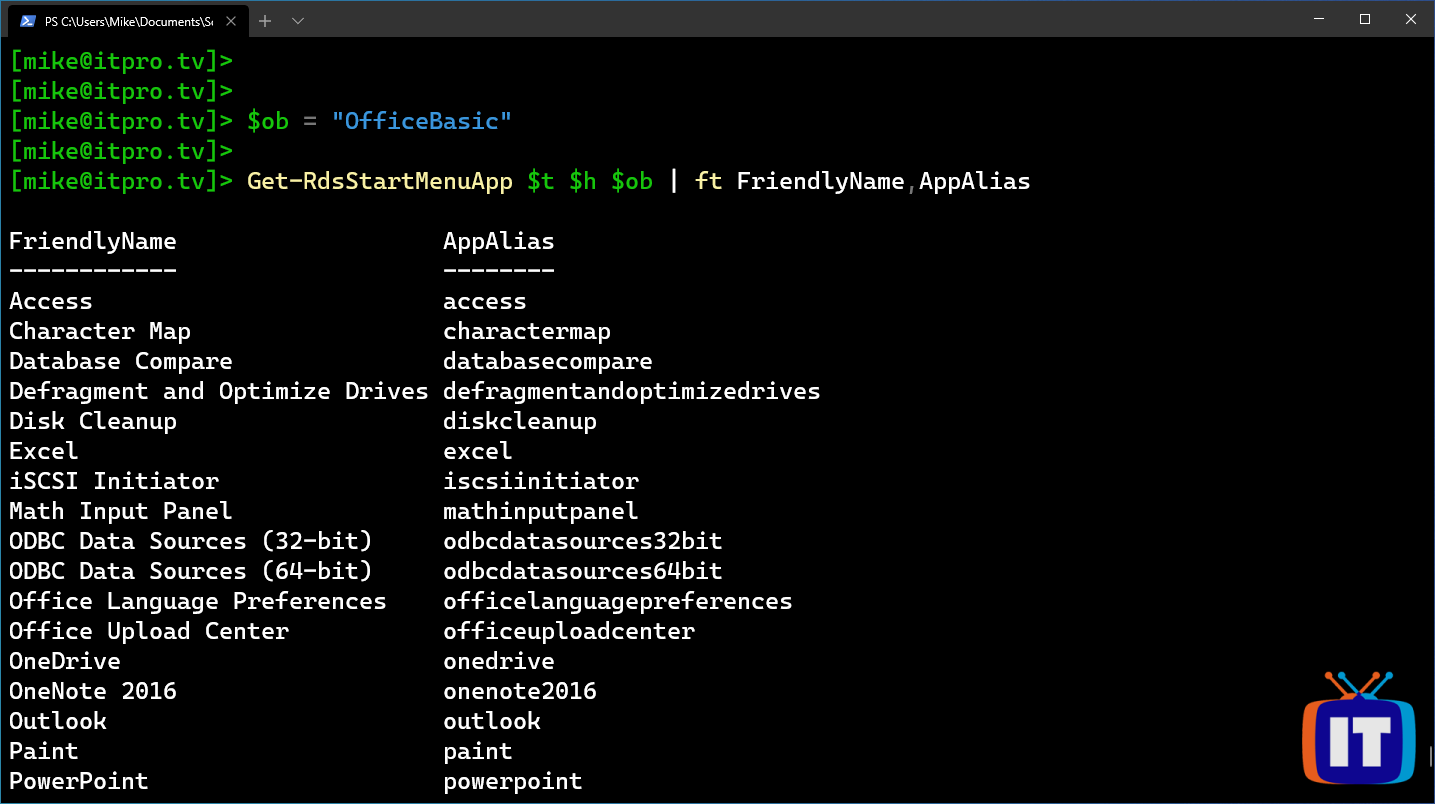
- Use the following cmdlet to publish an application to a RemoteApp group, repeating for each application you want to publish:
New-RdsRemoteApp $t $h $ob -Name “FriendlyName” -AppAlias “AppAlias”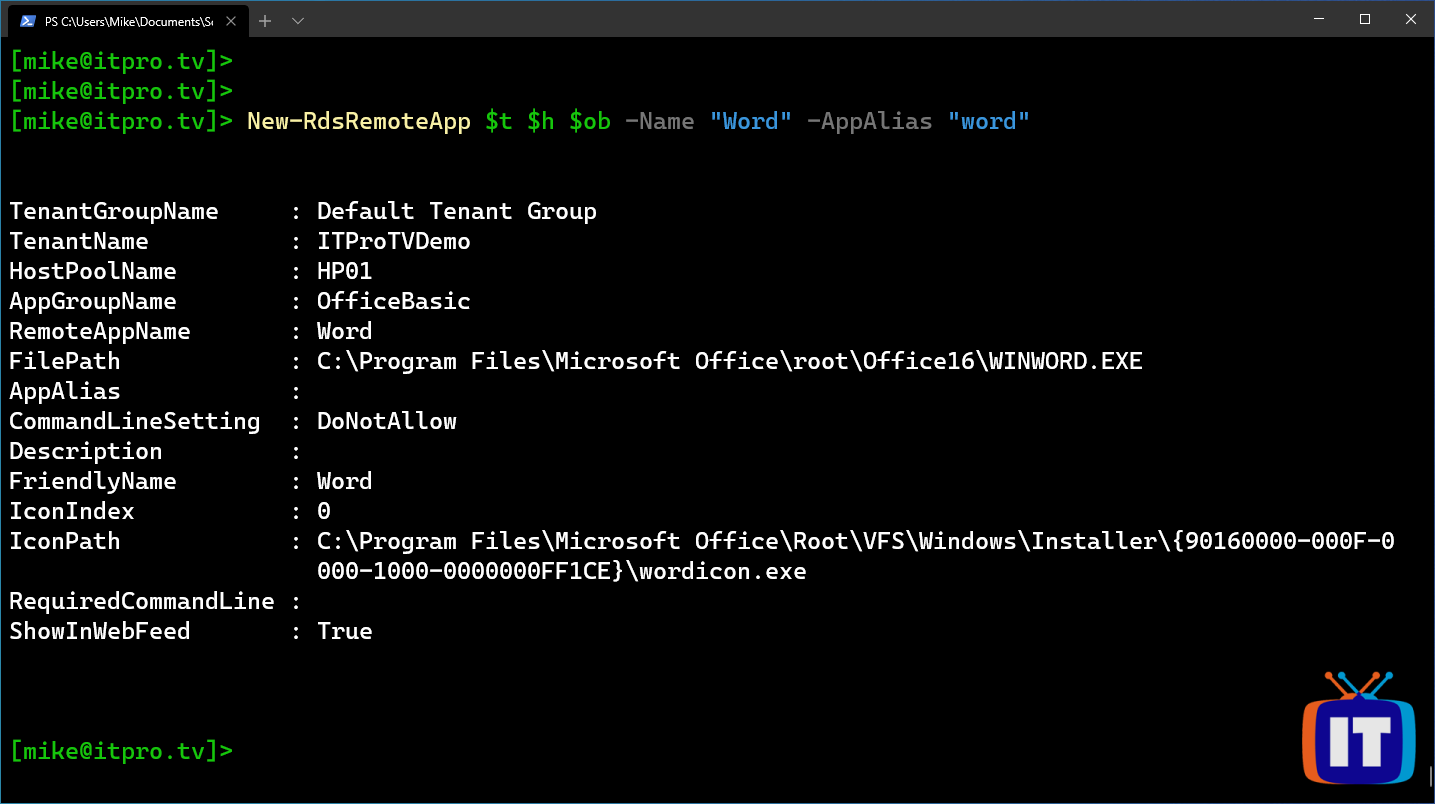
- Verify all the applications were successfully published with the following cmdlet:
Get-RdsRemoteApp $t $h $ob | ft FriendlyName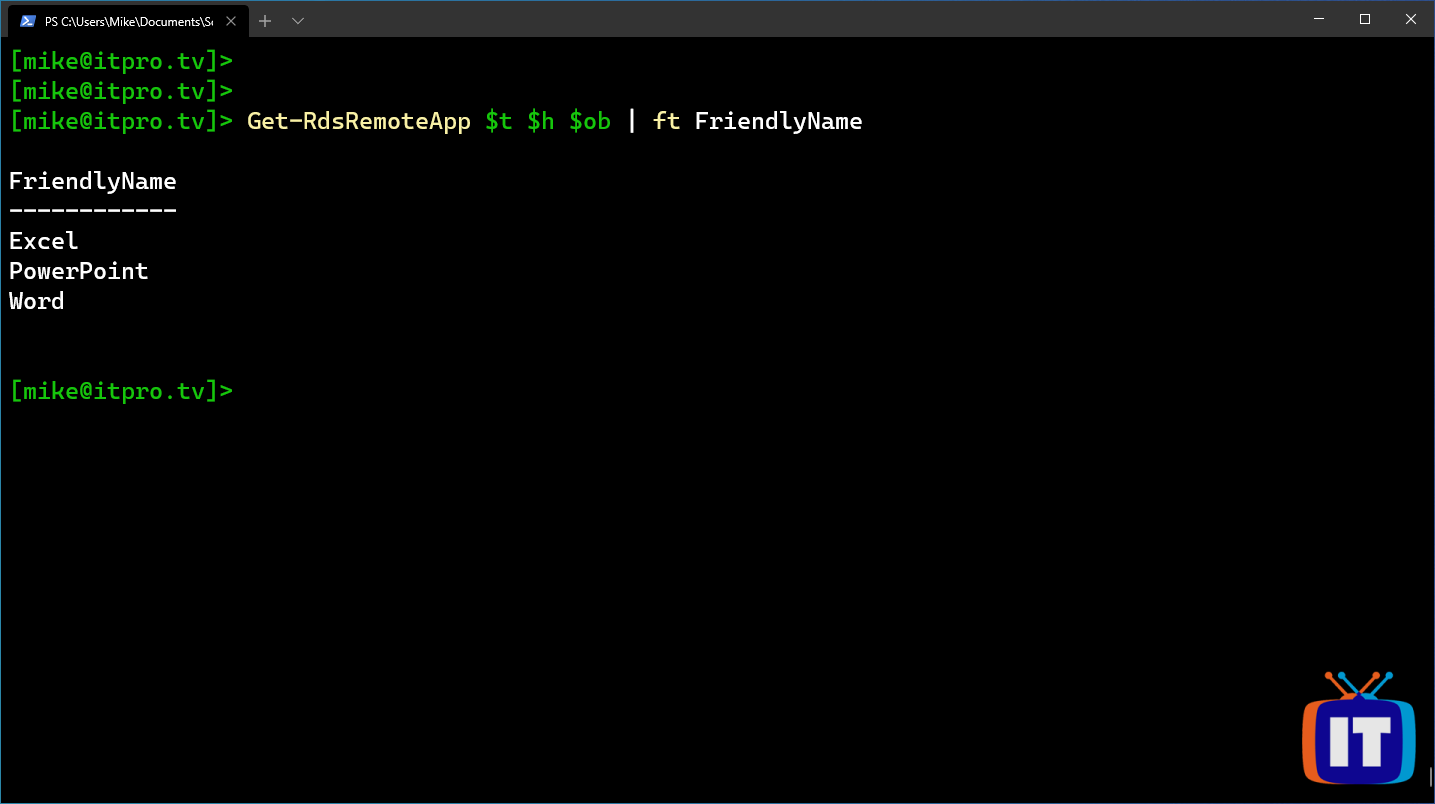
Add users to a RemoteApp group
Now that you have created a RemoteApp group, you will need to grant users access. Users can be granted access to multiple RemoteApp groups. This allows you to control what apps a user has access to simply by granting or removing access to the RemoteApp groups.
You can create as many RemoteApp groups as necessary to support the various roles and needs of your environment. Maybe you have a basic app group that many users access, and specialty app groups for certain users that need a particular app or set of apps. When their access needs change, you can change what RemoteApp groups they have access to.
The exception is the Desktop Application Group. If a user has access to the Desktop Application Group, they already have access to all the available apps in the host pool. Therefor you cannot add them to any additional RemoteApp groups from that host pool. If you want to limit what apps they have access to by adding them to RemoteApp groups, you will need to remove them from the Desktop Application Group first.
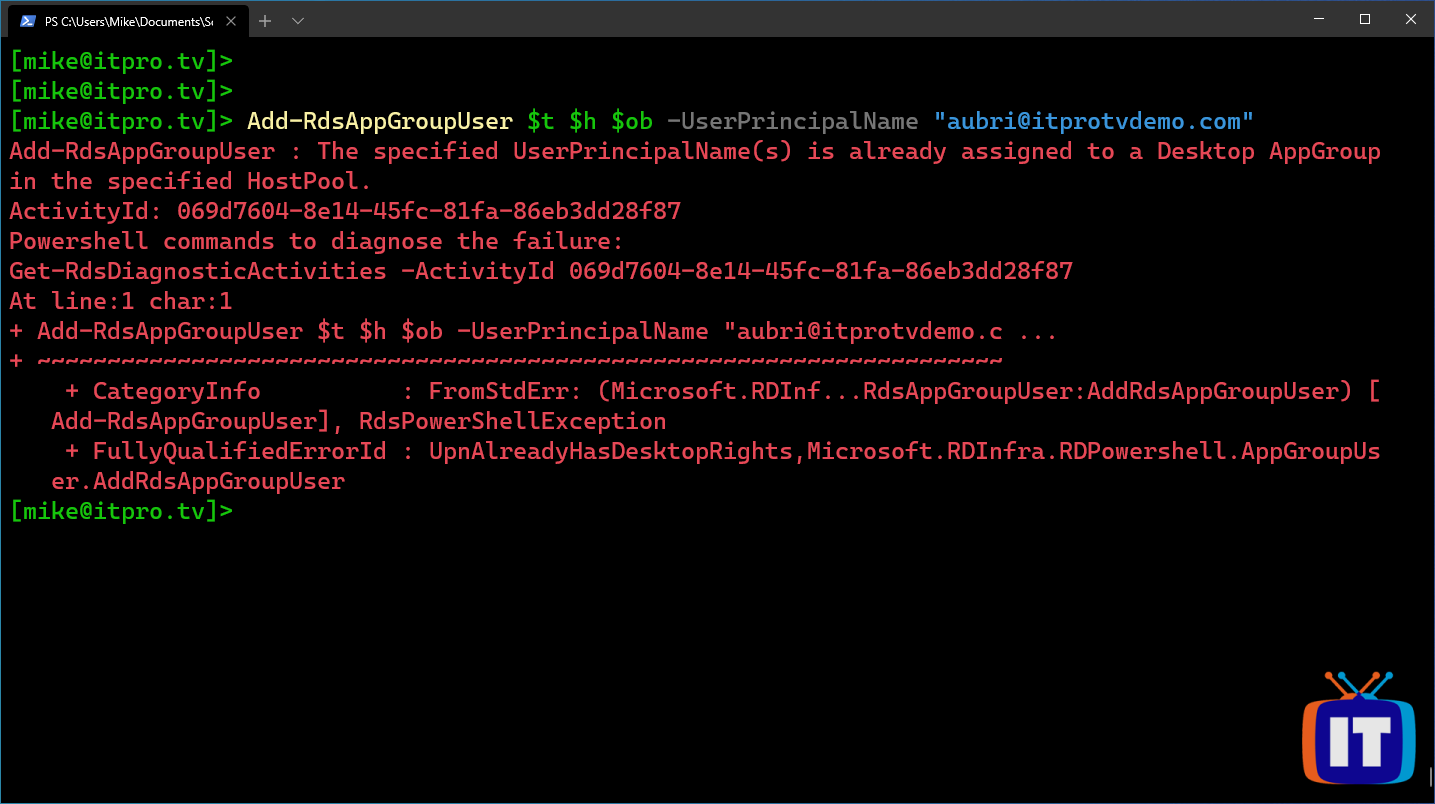
Try to add your test user that you gave access to the Desktop Application Group in Part 4 to the RemoteApp group you just created.
- To grant access to the RemoteApp group:
Add-RdsAppGroupUser $t $h $ob -UserPrincipalName “userUPN”This will fail because “The specified UserPrincipalName(s) is already assigned to a Desktop AppGroup in the specified HostPool”
- You must first remove the user from the Desktop Application Group, then you can add the user to the RemoteApp group you created. Use the third cmdlet to verify the user has been granted access to the RemoteApp group:
Remove-RdsAppGroupUser $t $h $dag -UserPrincipalName “userUPN”
Add-RdsAppGroupUser $t $h $ob - UserPrincipalName “userUPN”
Get-RdsAppGroupUser $t $h $ob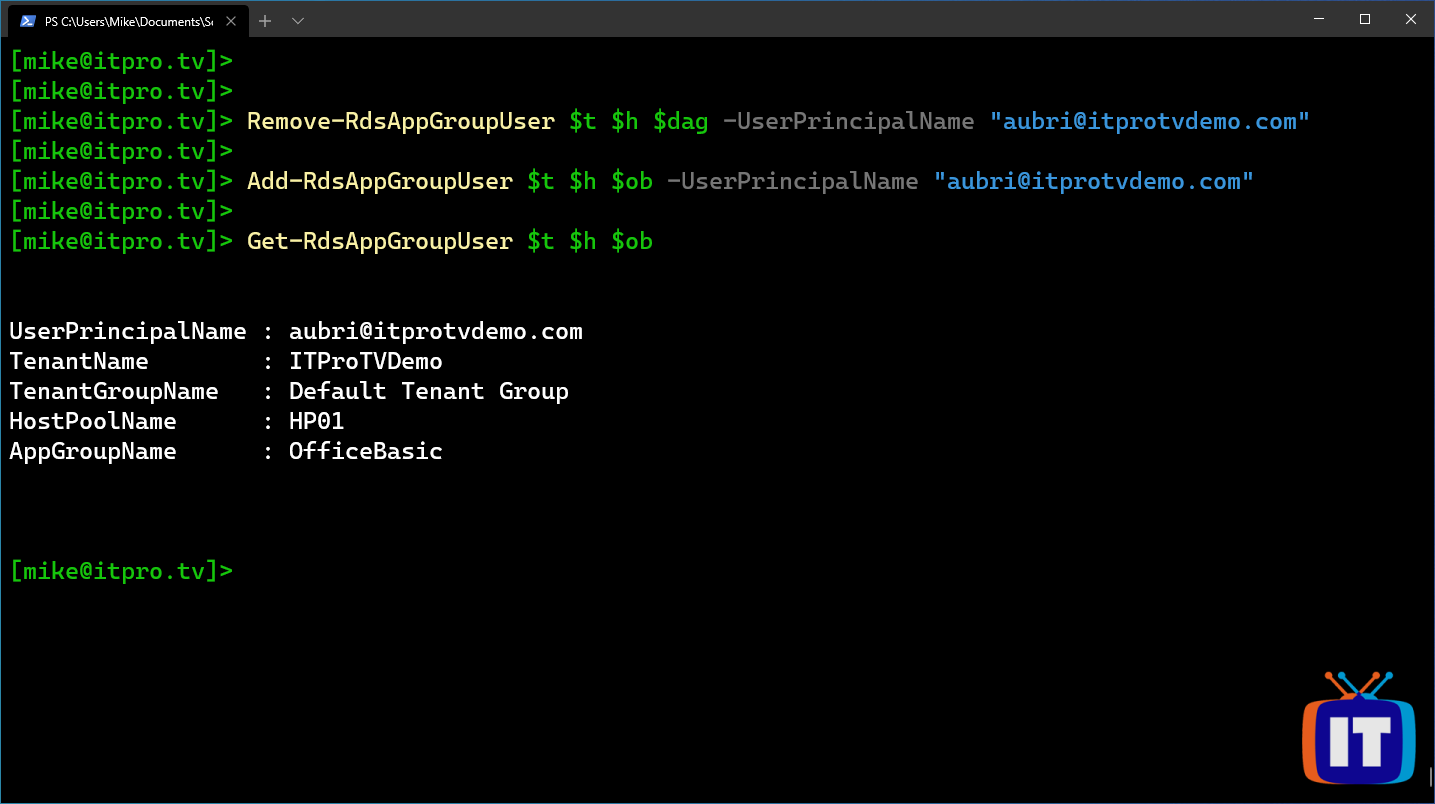
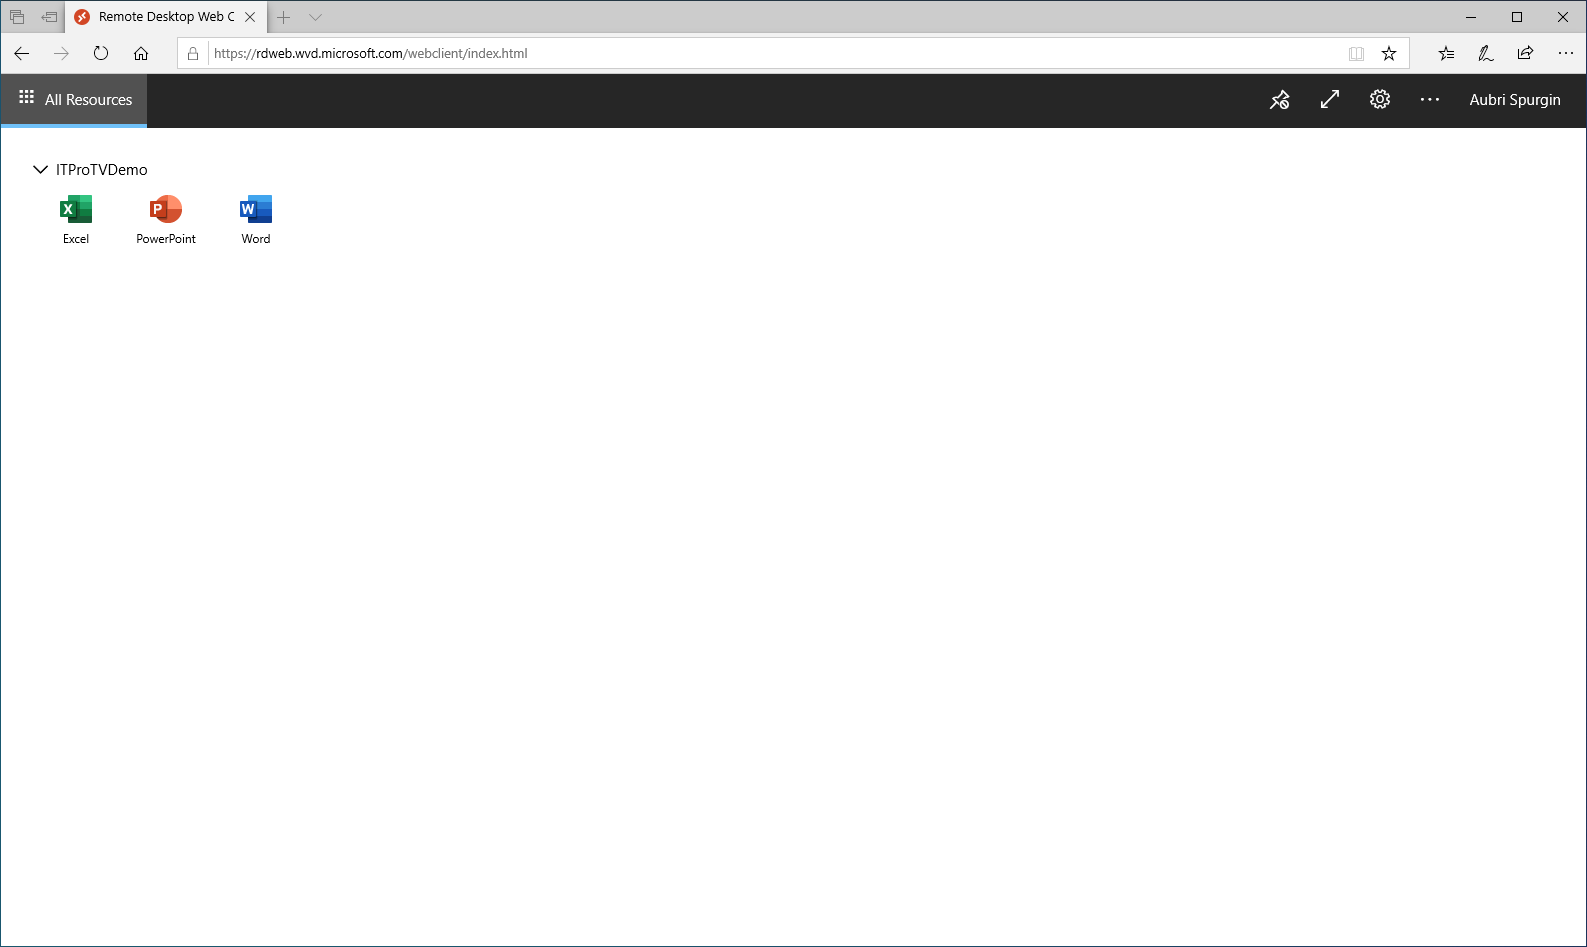
- Now open a browser and navigate to https://rdweb.wvd.microsoft.com/webclient. Authenticate as the user you granted access to. You should see they no longer have access to the full desktop, only the applications you published.
- To test adding a user to multiple RemoteApp groups, first create another RemoteApp group and publish an application using the following cmdlets:
New-RdsAppGroup $t $h -AppGroupName “Publisher” -ResourceType “RemoteApp”
New-RdsRemoteApp $t $h -AppGroupName “Publisher” -Name “Publisher” -AppAlias “publisher”
- Add the same user to the second RemoteApp group:
Add-RdsAppGroupUser $t $h -AppGroupName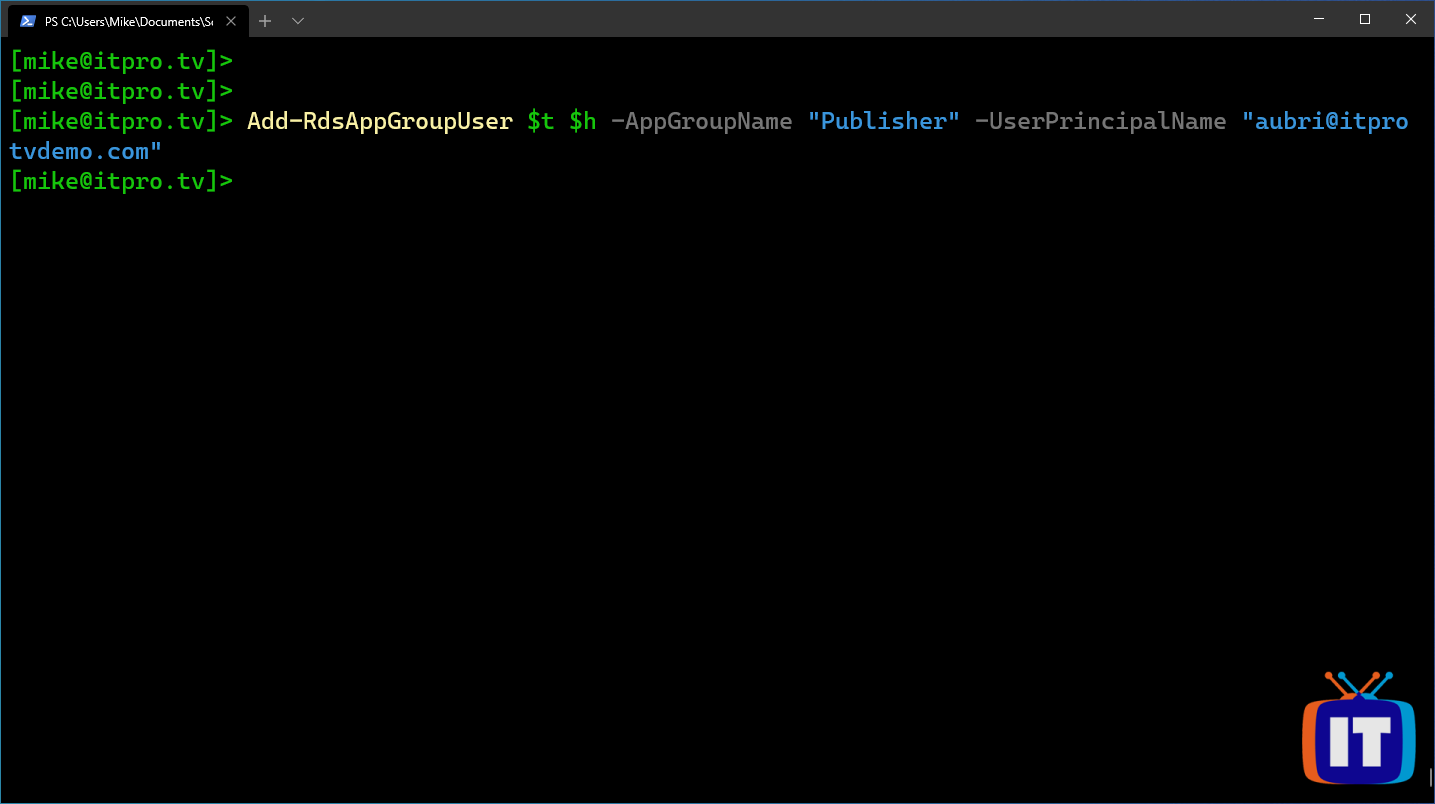
- Refresh the Remote Desktop Web Client, and the new app should appear.

What’s Next?
Now you can manage WVD app groups using PowerShell. You can give users access to a full Windows 10 desktop, or to specific apps using RemoteApp groups. Now you need to get your users connected. In the next part, we will look at the various methods they can use to connect from any device. See you there!
Make sure to check out more great articles at ITProTV
I’ve also done two webinars on Windows Virtual Desktop. You can watch them on demand for free:
Comments are closed